Pages

Showing posts with label painted papers. Show all posts

Tuesday, February 28, 2012

marbled paper

You probably know by now that I am completely obsessed with painting papers.
This will be the third (and final) installment in my "painted love" series and I saved my favorite for last.
I've tried a number of different techniques for marbling paper, but this one is my favorite.  It's cheap, easy and (relatively) not messy.

I start by pouring about an inch of liquid starch into an old 9"x12" pan.
(The only place I can find my liquid starch is Walmart - in the laundry aisle. It's dirt cheap and comes in a big bottle)
I mix cheap acrylic craft paints with water to make it drippy. How much water? It depends -this is a trial and error kind of thing because every paint has a different consistency.  The goal is to get the paint to float on top of the liquid starch.  If it's too thick it won't come off your brush in the first place, and if it comes off your brush but immediately sinks to the bottom of the pan it means you need more water.  Here are two colors floating on top:
I gently stir them with a chopstick:
I move the chopstick up and down until it looks like this:
I drag my handmade comb lightly across the surface to feather the paint.
(the comb is made from toothpicks sandwiched between 2 pieces of cardboard.  I think I learned it from Martha but can't find a link)
Now the surface of the water looks like this:
I lay a piece of card stock on top of the water and gently press it down to make sure the whole surface of the paper touches the paint:
I quickly peel it up. (this picture was from a different experiment, hence the orange paint)
Then I dunk it in a bucket of water.  You can also run it under the faucet, but I don't have a sink in my studio and I hate working in the kitchen.  This bucket works just fine.  I swish the paper around to get all the gloppy starch off the surface.  The paint stays on the paper.
Here's the finished piece:
If you're continuing with the same color palette, you can reuse the starch for many many pieces of paper. You can drag scrap paper or a paper towel over the surface to pick up any paint you didn't catch on your print, or you can leave it there and just add more paint for your next print.  Eventually you'll find your prints aren't as crisp or the colors are muddying - rinse out your pan and start over!  The big bottle of starch will get you through several sessions.

As much as I like the traditional feathered look, I absolutely adore the abstract "blobby" look, like this one:
Same technique, only this time leave the paint floating on the surface without stirring or feathering.  you might want to gently tip the pan or blow on the surface just to get the paint to spread, but leave it loose.
You can see a whole bunch more of my papers in this old post.
And here are some recent projects using my papers.
I used this one as a background for a poppy painting:
I used this one more traditionally - as endpapers in an altered book.
and check out the book - it has little DRAWERS in it.  I learned this trick from Amy in her awesome (free) altered book class on Flutterbye.
I've also been using them to decorate Altoid tins:
Big fun.
Try it.

Friday, February 17, 2012

Painted Love

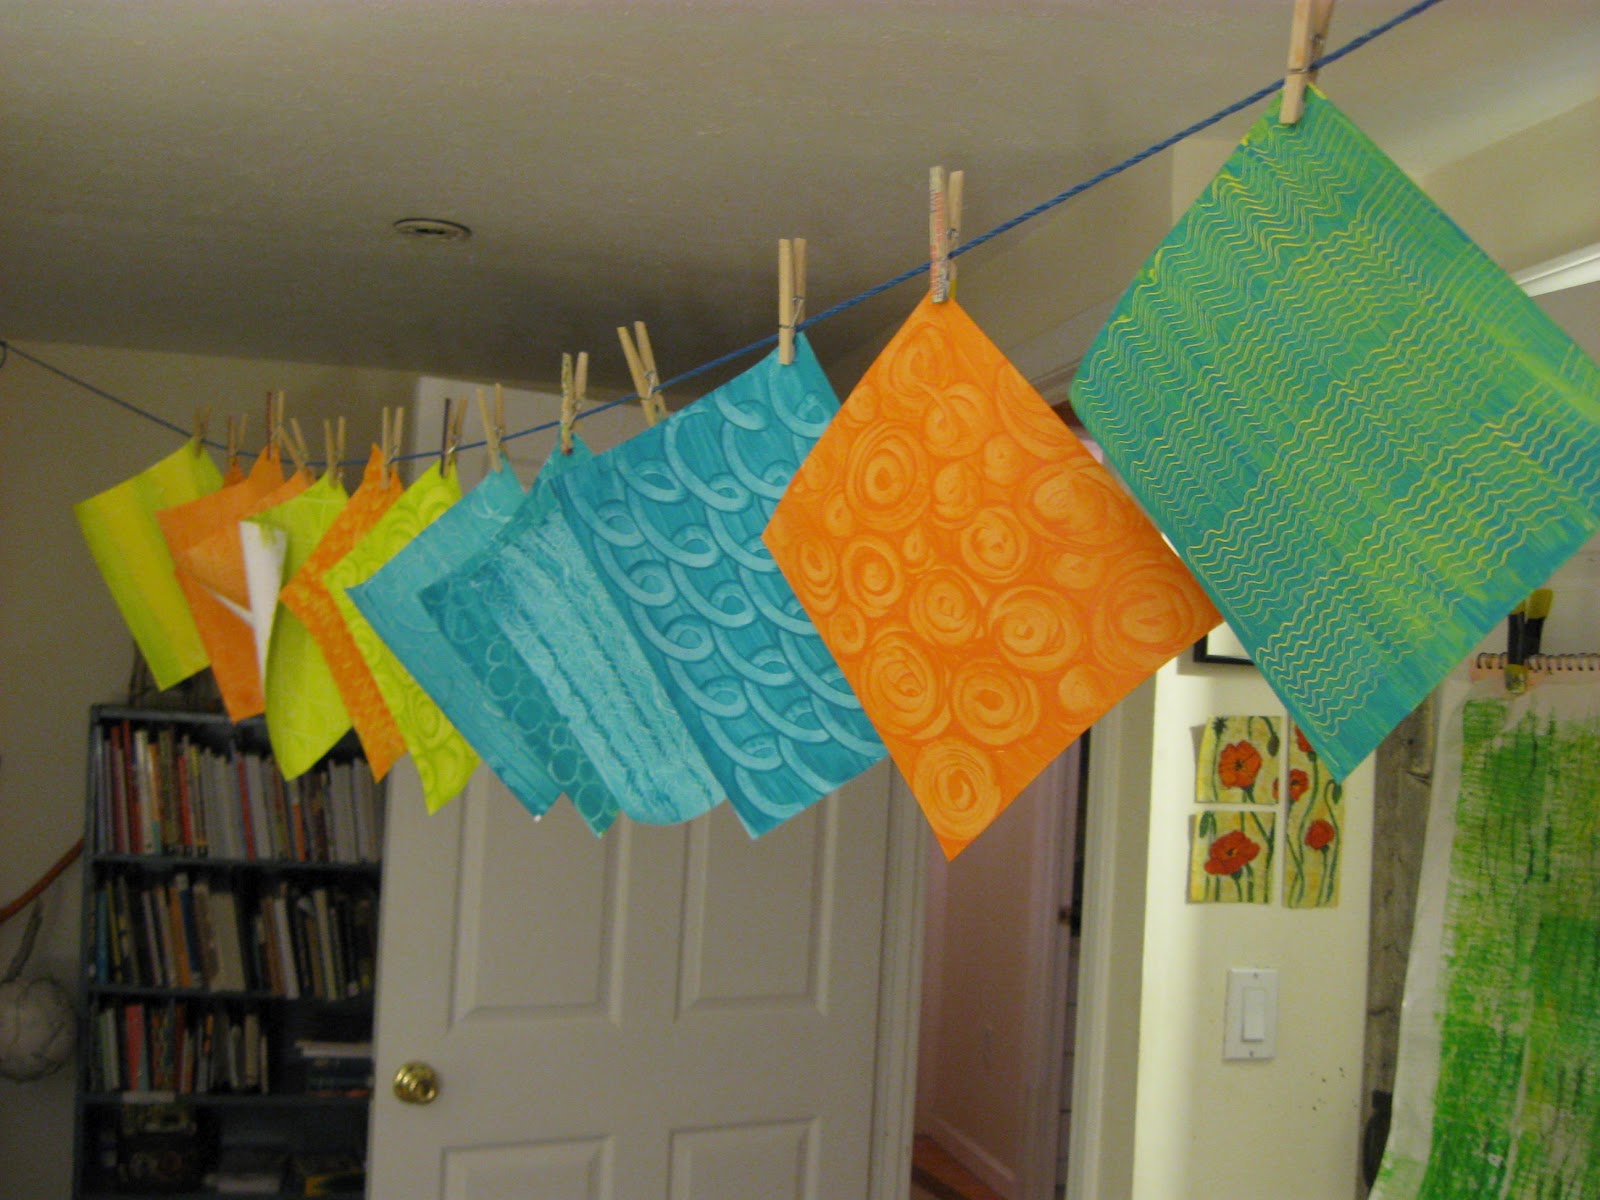
As you may have guessed from this picture I posted on Sunday, I  love to paint papers. 
A few people asked me about what they are and how I made them.
All the painted pages below are gelatin prints and I posted a little tutorial about it a million years ago.   I used an actual gelatin block that I made with unflavored gelatin, but it seems you can now buy something to simulate it.  You can find my tutorial here. 
The papers hanging on this clothesline are simple paste papers.
Here's how to make them.
In a nutshell, you mix paste with paint, spread it on the paper and make marks.
I bought a carton of Elmer's Art Paste and mixed up the whole box.  (It makes a gallon).  You really don't need much for any painting session, but this stuff seems to keep indefinitely.  I've had the remainder of the gallon sealed in a plastic container for over 2 years and I just used it last week and it was fine.  I mixed a blob of paste with a blob of cheap acrylic.  (maybe 2 parts paint to 1 part paste?  I wing it)
I spread it on cardstock with a brush:
And while the paint is still very wet, used a bunch of different tools (including my fingers) to make marks.
You can use colored paper and paint a different color on top for a 2-color effect:
This one is blue paint on yellow paper:
Here's are a few more examples: 
On this one I painted stripes on the paper before making the marks
 On this one I used a rubber stamp:
 more finger painting:
 So now I have enormous piles of painted papers.  What do I do with them?
Sometimes I use it as a great first layer of an art journal background.
Usually I cut them up and use them in different things.
For a while I was really into creating tiny mosaics.
None of these individual colored pieces are larger than a square inch
I used a bunch on a journal cover a few years ago:
This hangs on my studio wall:
Now I'm more likely to use them as collage elements in mixed media pieces:
I like marbled papers even better than paste papers, but we'll talk about that another day.

Wednesday, June 1, 2011

Marbling

There are few things I like better than painting papers. I make piles and piles of background papers. I love the process, I love the results. For years, that's as far as it went. Stacks of paper I'd take out to look at and then put away. Now I've started using them for journals and mail art and my supply is shrinking. (I was going to say dwindling, but that would be a stretch. I have plenty, but there's always good reasons to make more.)

I started marbling Saturday evening and worked until 2AM. I ended up making more than 80 papers. I first tried marbling more than 20 years ago when I got the ambitious idea to hand-make my sister's wedding shower invitations. (this was WAY beyond my skill level at the time, but it didn't stop me).
I don't remember the exact technique, but I know it involved oil paint and turpentine and supplies that were hard to find, expensive, and crazy-messy and hard to work with. The results were colorful, but not very satisfying. I used them anyway and my dear sister didn't complain.

I've since learned how to do this with liquid starch and cheap acrylic paint and I'm SO happy with the results. Supplies are cheap and readily available and easy to clean up. And since I use those cheap craft paints that cost less than a dollar, I can spring for a wide pallet of colors.

So here's a selection of what I churned out. My mail art friends will start seeing them in their mailboxes soon!

Some of the pinks and oranges


The earth tone pallet


The blue and green pallet


I do some traditional feathering patterns like these:

and some swirly ones like these


But my FAVORITES are the blobby ones like these:


Saturday, April 23, 2011

Gelatin Prints

I've been very productive today!
These are some of the prints I made using unflavored gelatin as a printing block.


Here's my block of gelatin


I used acrylic paints and a brayer

and covered the gelatin block with paint


I laid down some paper circles on top of the paint


then I rubbed the paper over the block


Peel up the paper

Peel off the circles

Make another print

Spread pink paint on the gelatin and put the circles down in different places
lay the first print on top and rub
two layers

the second orange print rubbed on the pink paint

Here are some others using 3 colors and different masks/stencils


This was SO MUCH FUN. I made about 65 pages, each one with 2 or 3 layers and the gelatin block is still in great shape. I put it back in the fridge in case I want to make more!
Now how will I use them.....?