
Have you checked out Kristin's tutorial try-out series?
Last week the tutorial to try was using glue as a resist.
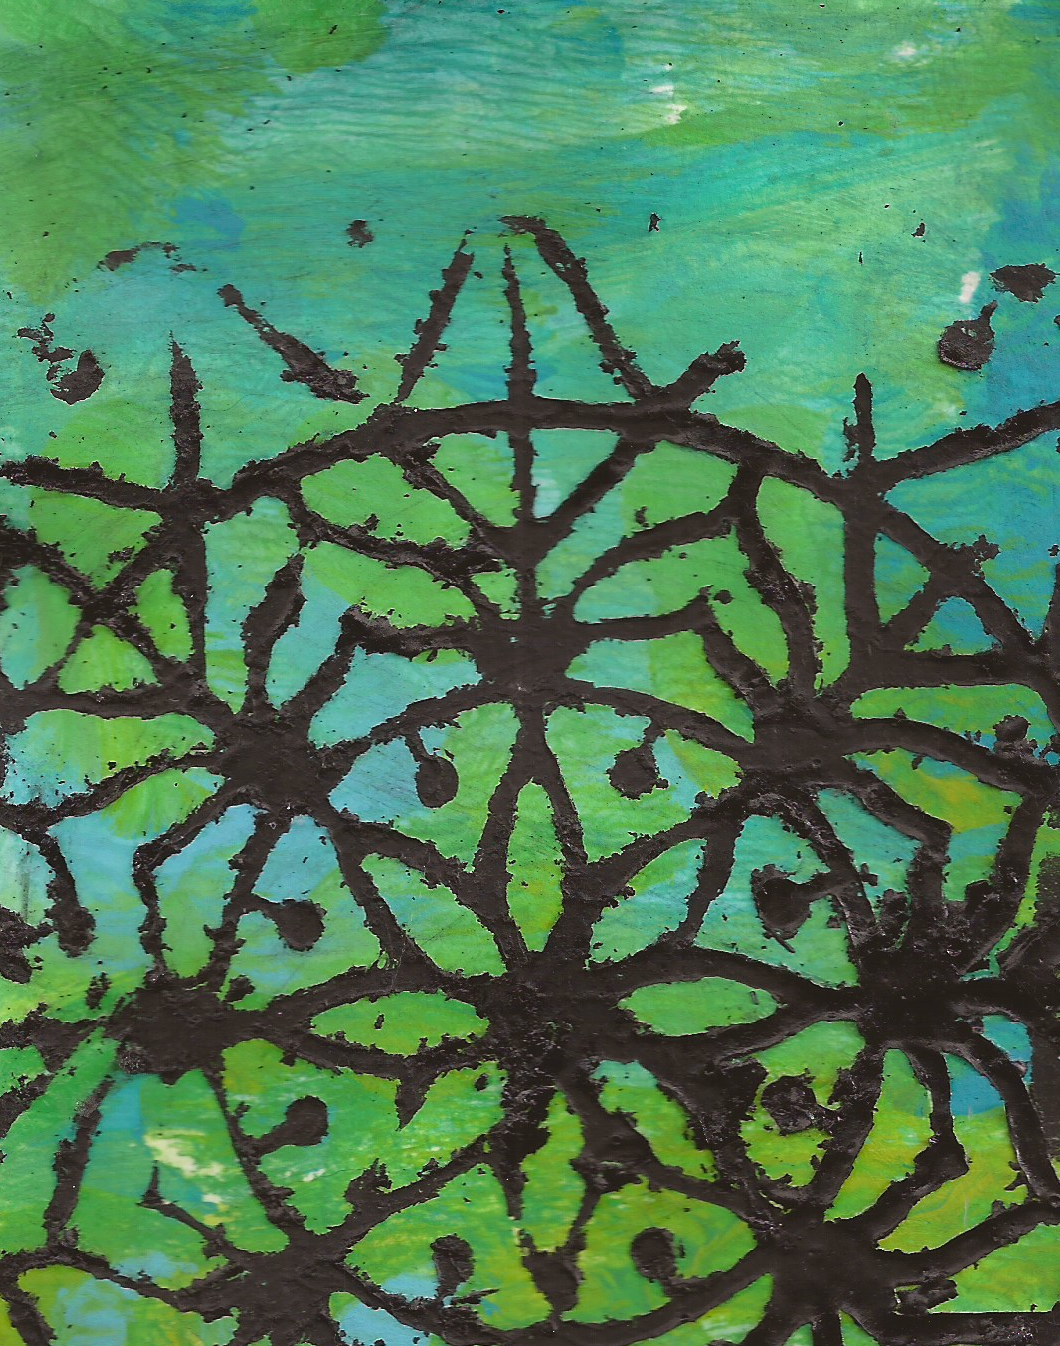
For my first attempt, I grabbed a bottle of Elmer's gel glue and drew this mandala-type thing (free hand, not much thinking or planning). I let it dry overnight and then added some color with pan pastels and spray inks. It resisted the color pretty well and though you can see where my unsteady hand dripped or dragged the glue, the gel glue really held a clean line and didn't ooze all over the paper after I doodled with it. Now that it's dry, the glue has a raised, slick texture.

These next two were made by sponging Mod Podge through a stencil. The first one was a lighter/slightly uneven application of the glue. Once dry, I used red acrylic paint over it and it wasn't resisting very well. I spritzed it with some water while the paint was still wet and gave it a good scrape with a stiff card and then the white squares were more visible.

I used more glue on this next one, and I watered down my paint before applying it and the resist was much more obvious. I used a sponge brush to apply the glue and it dried nice and flat without much texture.

For this next one I brushed Mod Podge over a hand carved stamp and pressed it on the paper.
It was a little hard to get just the right amount of glue and to keep it from smooshing around too much while I stamped it, but it did a great job resisting the acrylic paint.

Here's another attempt at brushing glue on a stamp.
Less glue = less smooshy, but also a more subtle resist.

This next one was done by dipping various size bottle caps and jar lids in Mod Podge and stamping with them. The circles are slightly raised. I like the way this one turned out.

This next one is just glue stick smeared at random. I applied pan pastels after it dried and it looks a bit like a stormy sky.

I was on a roll, so I decided to see what would happen if I drew something with hot glue.
It certainly acted as a resist, but the cloudy hot glue over the boring white paper didn't do much for me. I ended up rubbing gold all over the raised bits and around the edges.

I tried the hot glue again, but this time I used some patterned paper underneath, hoping it would look cool showing through the glue. After the glue dried, I painted around it with gesso, and then used pan pastels to add layers of color over that. The paper sort of shows through the glue (the raised glue swirls have no paint on them - the bluish green color is the background showing through).
I added doodles with gold sharpie and a fine point black pen.
I think I'll send these two to Gina for her Resident Mail Art project, since many of the residents have low vision and appreciate high contrast and/or textured art.

All of this gluing reminded me of a technique involving drizzled rubber cement and water colors. I drizzled, I let it dry, I painted, I sprinkled salt while the paint was still wet, I let the whole thing dry then rubbed off the salt and rubbed off the cement. I'm thinking of doing this with my summer camp kids this year so I made this with super bright liquid watercolors as a fun sample.

So now I have a stack of resist backgrounds - what the heck will I do next?
The messy glue stick sky inspired this landscape made with "citra solv" magazine pages, and gelatin printed deli sheets.
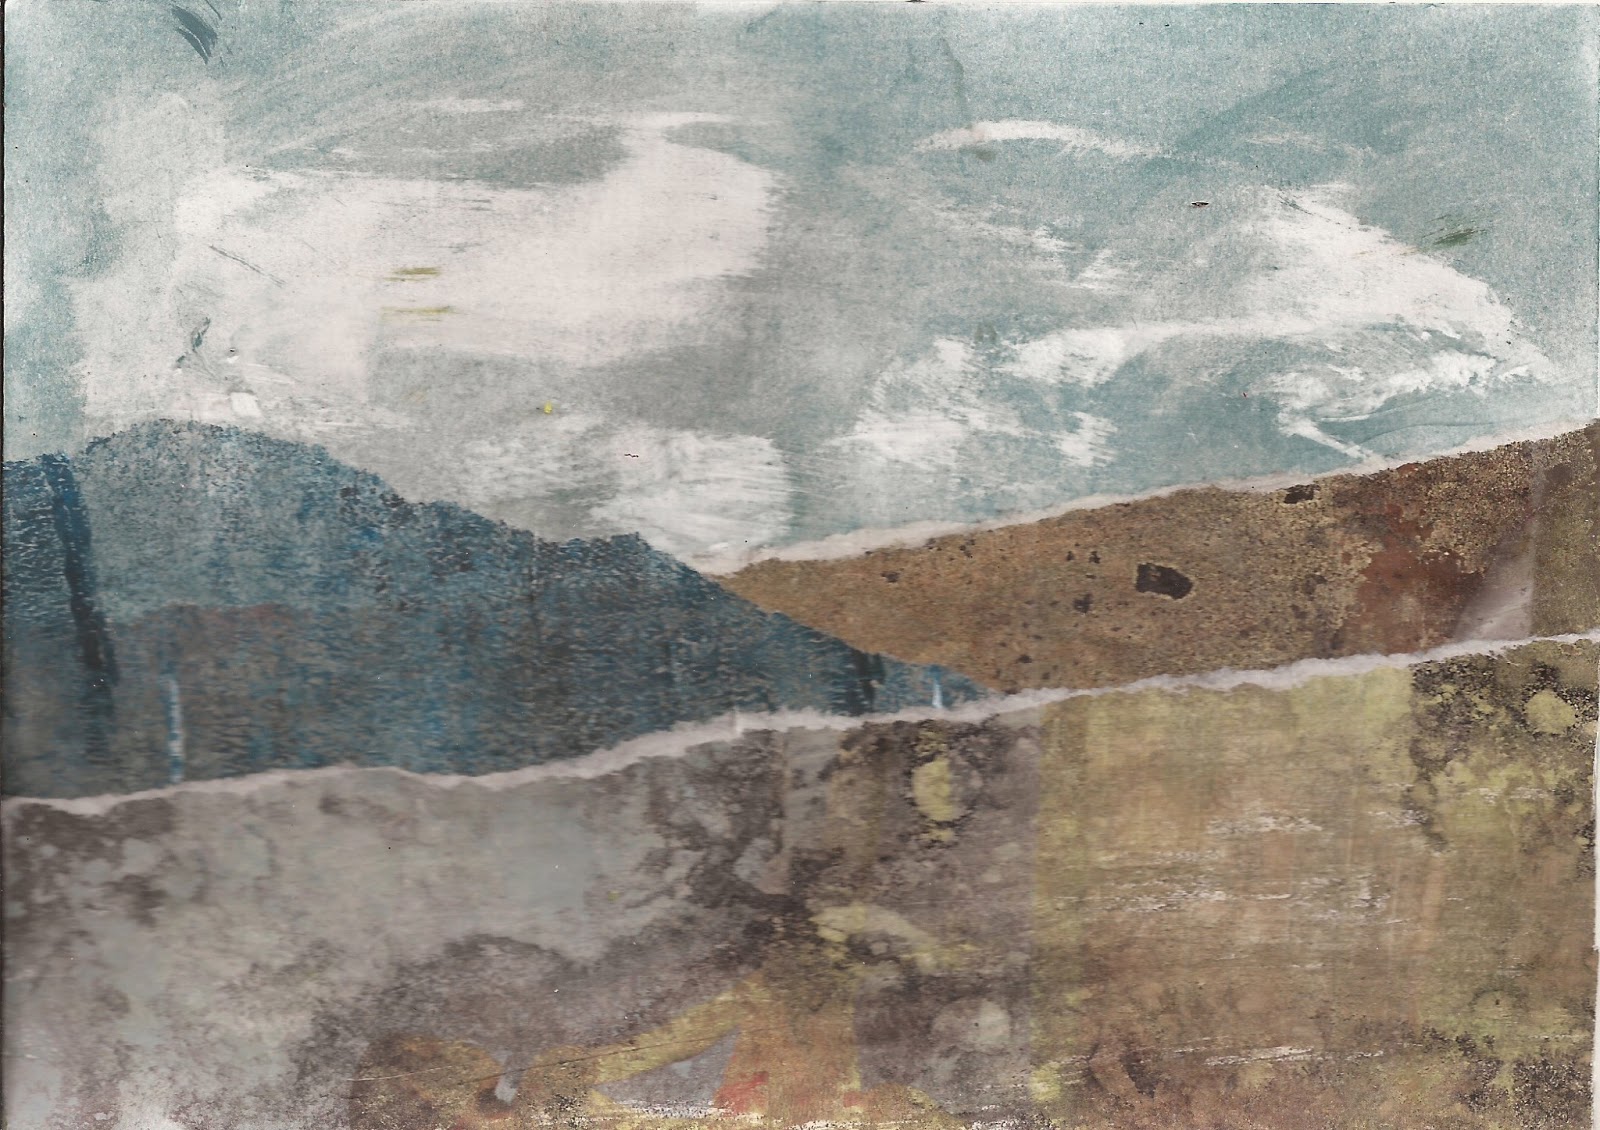
I cut up the red squares and the black stamp shapes to make this collage. I added some metal fake
gears and used the stamp again to emboss that silver shape at the bottom.

I used the orange circle background for this little collage, inspired by the stamps that came on an envelope from Jez this week.
(purple textured scrapbook paper and a green gelatin print of a leaf)

And if you're not completely tired of resist techniques, let me show you one more.
Kristin's first week of "tutorial try-outs" featured this Vaseline resist technique from Julie Fei-Fan Balzer.
I grabbed a stencil, laid it on some white card stock, smeared a heavy layer of Vaseline through it, lifted the stencil and painted all over the paper (and Vaseline) with a mix of blue/green/yellow acrylic paint. When it was dry I wiped off the Vaseline.
It looked cool and left some pretty crisp lines showing, but since I have a hard time visualizing "positive" and "negative" space, I couldn't really see how this was different from just using my stencil the regular way.

So I laid the stencil over the painted background and used black paint over the stencil, like so:

Finally, I had to give the Vaseline one more shot. I put the stencil over the painted background, rubbed on the Vaseline again, peeled off the stencil and this time painted black paint just on top of the Vaseline, not all over the page. It got a little muddy in places, but still looked kind of cool.
Overall, this was not as messy as I assumed it would be, and didn't leave the paper as greasy as I thought it would. It was pretty fun.
Here's how I pulled all three together of the above prints into a postcard. The white and black images were overlapping on the original paper, so I judiciously cropped the page to 4x6 and then cut out the black Vaseline shape and glued it on top.

Fun stuff!
Many thanks to Kristin for hosting this little party, pointing out these great tutorials and inspiring me to try something new. I can't wait to try out this week's tutorial!
Whew, you are one busy lady! Lots of interesting glue techniques to try out though! Bookmarking!
ReplyDeleteI've tried some of these...we used the gel glue resist technique to make t-shirts. We let the glue dry thoroughly, then sprayed the shirts with watered down liquid acrylics and let the paint dry. Then I scrubbed the gel glue off. It gives a batik effect. We made some really nice t-shirts that way!
ReplyDeleteI'll be bookmarking this so I can refer back to it. :-)
Great job!! I've had the rubber cement/batik art to try on my list for years.... Even had to buy a new jar of rubber cement since the first one dried up...:D! Great inspiration, and all the links you shared too! and thanks in advance for the RMA beauties~
ReplyDeleteExcuse me while I sit down for a couple of hours ..... I'm amazed at your output, as always, and exhausted st the vision of it!
ReplyDeleteEverything is fabulous, and so inventive. I think my pva glue must have been too thin.
I now want to try all the ways you have used the resists. I don't know what modge podge is, and can't recall seei ng rubber cement in the shops, butt the results are stunning. I do like the rubber cement version, so abstract and colourful. I can see the kids loving it.
The English postage stamp one is cool too. Jez
Looks like you had some fun! I haven't done much with resists but now I may have to try some.
ReplyDeleteSo many great techniques!! You must have incredible patience waiting for all of that glue and mod podge to dry. I love seeing what pieces you created with all of your pages. Thanks for sharing the bright corners of your brain with us!! xx
ReplyDeleteThe wheels are turning! I have to try some of these techniques. As so as I have time......
ReplyDeleteI love what you did with this. I imagined an awful greasy mess with the vaseline. I will give it a go now though.
ReplyDeleteWow, Karen. You are one super creative woman! I want to give it a try but am still working on etegami. *sigh* So many things to try. Do I have enough time? :)
ReplyDeleteVery very pretty.
Wow, wow, wow! You always amaze me...
ReplyDeleteI love that you shared results from so many glues (and vaseline)!
The way you incorporated your stormy sky resist with the citrasolv papers is fantastic :)
(I've been wanting to try citrasolv papers too... I have boxes of old National Geographics laying around just waiting... Hmmm...)
xo
Kristin
p.s. You are the inspiration for next week's tutorial!
oooh!
ReplyDeleteResists are one of my favorite techniques. Such fun and great pieces you made with it all.
See...right here. This is what I was talking about in my email. I will not be going to back to reading the amount of blogs that I once read, but I will be reading yours! Yay!
ReplyDeleteI love this so much! Both resists, and also your examples of them. You have really dived in with these. I want to try them. I may not even wait for my non-working weekend.
ReplyDelete