If you're just tuning in,
go back to part one to see what the heck I'm talking about.
Now that I've got 52 painted, glued and dried cards, it's time to add the inspiration.
I keep a file of quotes on my computer (that I started during last year's inspiration deck) so I had plenty of good quotes, affirmations and inspiring phrases to choose from.
I tried a few different ways of putting the words on paper
I hand stamped letters on paper, cut out the individual words and glued them on the card (adding some rubber stamps for good measure)
this one was stamped straight on the card (but had some spacing issues as you can see. and I was gentle with myself about it.)

This one is handwritten with a sharpie:
This one is computer generated, printed, cut and glued:
All of those things are somewhat time/labor intensive,
so in the interest of efficiency, I settled on this technique.
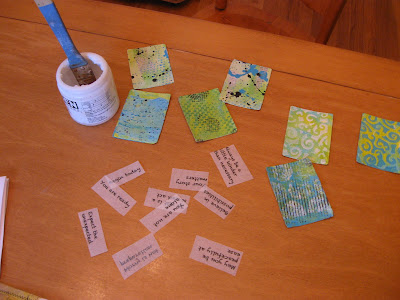
I printed all my quotes on tracing paper:
and cut them and glued them on the cards:
since the paper is transparent, the background shows through:
Then it was time to embellish them a bit.
To help the tracing paper blend into the card better, I colored with my neo-color watercolor crayons and smudged them with my fingers
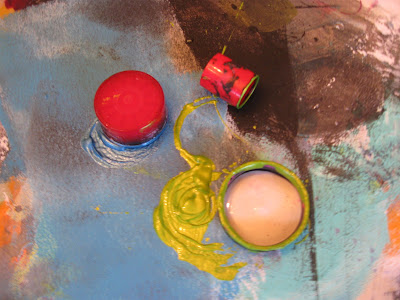
I used various bottle caps as stamps:

I used my favorite thrift store find as a stamp:
I used regular rubber stamps and an ink pad:
This one already seemed to have enough going on, so I added nothing.
So there you have it.
A full deck done in two sittings.
It could also easily be done in 5-10 minutes a day for a few weeks if that's what your schedule allows.
(roll one layer of paint, come back tomorrow. roll another layer of paint, come back tomorrow)
This is such a fun project and I hope you see from my photo-intensive posts that it can be really easy to complete.
and to quote our swap hostess, Jessica,
Go here for all the details on how to sign up.
Hope to see one of your cards in the deck I get back!


I love your cards, they came out fantastically!!! :) Great tutorial.
ReplyDeleteYour cards are wonderful, very 'YOU'!
ReplyDeleteYou are without a doubt the most productive, creative and inspirational person I know. (Yes, I know, I'm signed-up member of your fan club!). So many ideas, and such great results.
ReplyDeletea you make it sound so easy, I will follow the quote and not be to hard on myself, i agree with Jez you are the most productive person I know and I love your art, keep up your inspiring work..lt makes me want to work harder
ReplyDeleteWhat an amazing project! I had so much fun just now, reading through all of your posts at once. Your backgrounds looks awesome, and I like how you embellished the cards after adding the text. Your process looks like SO MUCH FUN!!
ReplyDeleteYou are so, so cool - it is sooo much fun to get a glimpse of you creating step-by-beautifully-messy-step! Thank you for such a great tutorial series... This temptation may have just pushed me over the edge... I think I may have to do this :)
ReplyDeletexo
Kristin
These did come out totally cool. Okay, done, signed up, I'm in.....now where is that gesso! I love your kitchen tool stamp....xox
ReplyDeleteThese are lovely. Thanks for sharing info on how you made them.
ReplyDeleteThese look great!!! WTG:)
ReplyDeleteFranT
I LOVE how you did these. So inspirational. Mine just need the quotes adding and there are some card I am less happy with, but being kind to myself and not stressing. I am sure they will look lovely once I have finished and I can't wait to pop them in the post. Even more so - I can't wait to receive my pack and so hope one of yours will be among my deck!! Thank you for sharing your wonderful ideas.
ReplyDeleteWhew!! Reading the tutorials made me feel like I just made all these!! I really want to join the swap, but I don't know if I will be able to do it in a little over two weeks...yes...I am THAT slow, or actually, I have another project to finish first. I may just give it a shot though.
ReplyDelete